24 Feb 2025
Using MobileSheets for sheet music on Android tablets
[ #android tablet bladmuziek technologie klassiekemuziek howto review 
This is a translation of a blog post from 2019 on my website. Most of the information should hold up today, but some of the content might be outdated.
In the past year, I’ve tried out various Android apps for sheet music. (Apple’s iOS may have more choices, but I’m not a fan of Apple.) My favourite among them was MobileSheets, which also has a free trial version available here. There’s a manual, but it can be a bit overwhelming. In this blog post, I’ll show you which options are most relevant for classical music.
The three main features that make MobileSheets my favourite app:
- Automatic cropping of page margins of sheet music
- Reference points for quickly handling repeats or da capos
- Concert mode that temporarily disables all menus
Note: MobileSheets is intended for the more serious musician who is willing to put in some practice with the app. If you're just looking for simple display of your sheet music without too much fuss, check out my list of other apps at the bottom of this blog post.
Music Library
When you open the app, you’ll first need to grant permission for the app to access your files. Press yes here.
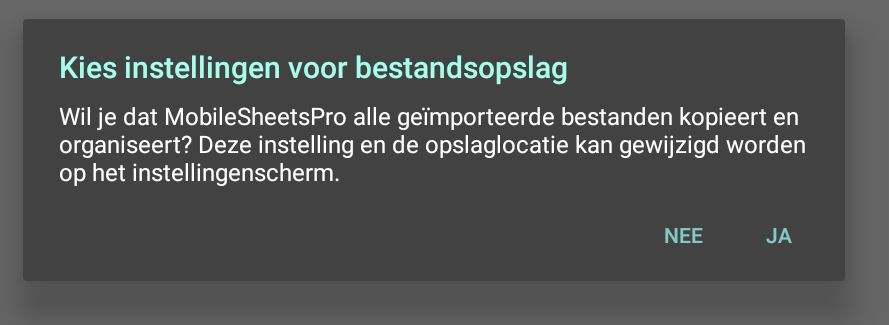 A very technical question in Dutch about having Mobilesheets manage where imported files are stored.
The app then asks a complicated question (see image). The easiest thing to do is press “yes.” This takes up more disk space, but ultimately makes it easier to keep track of any annotations you make.
You’ll then see the music library: an overview of all the sheet music you’ve imported. Right now, everything will be empty.
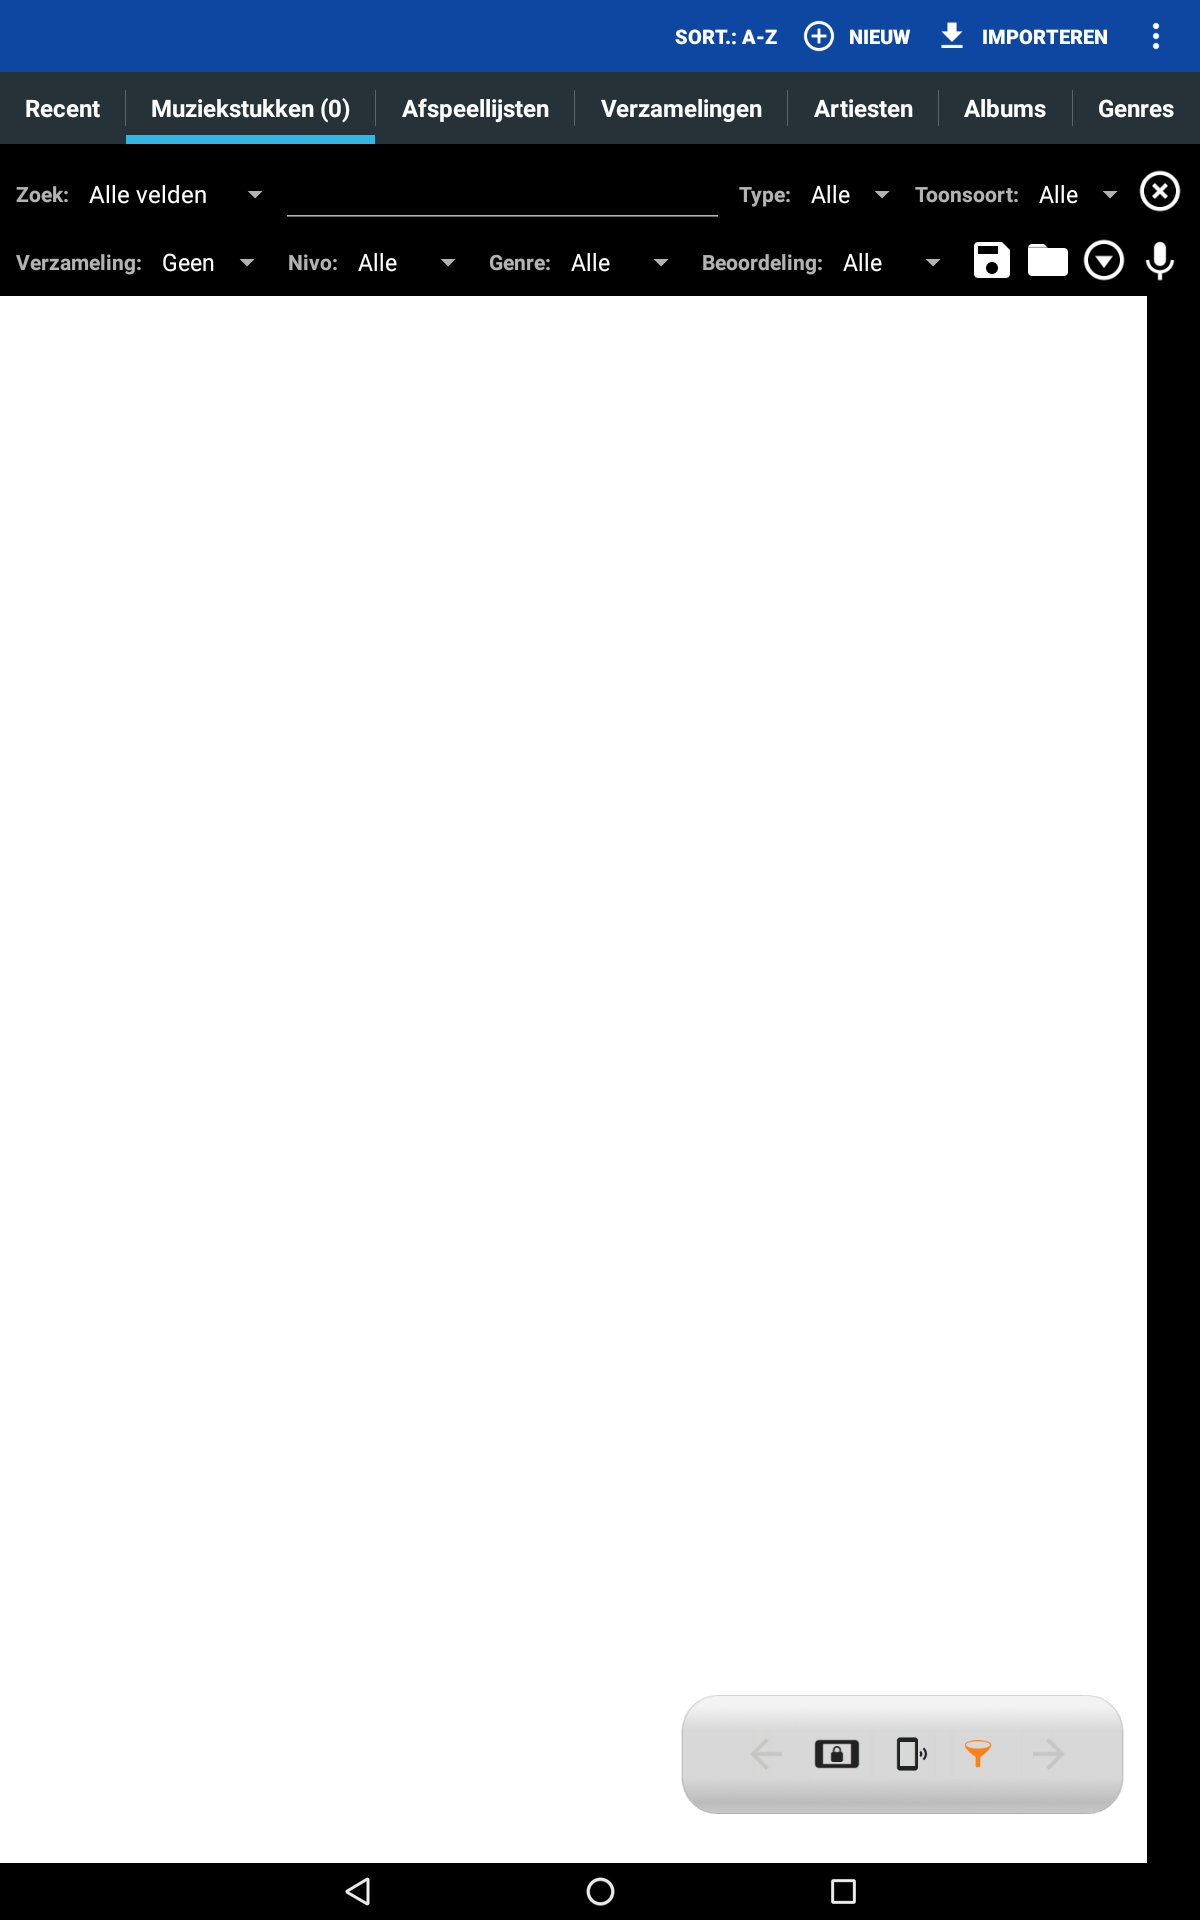 An empty library welcomes you.
Tip
You can import multiple sheet music files at once with MobileSheets, but it's better to use a file explorer to import the files you want to open one by one, as you need them. This allows you to ensure that all information is filled in correctly and that the margin cropping is successful.
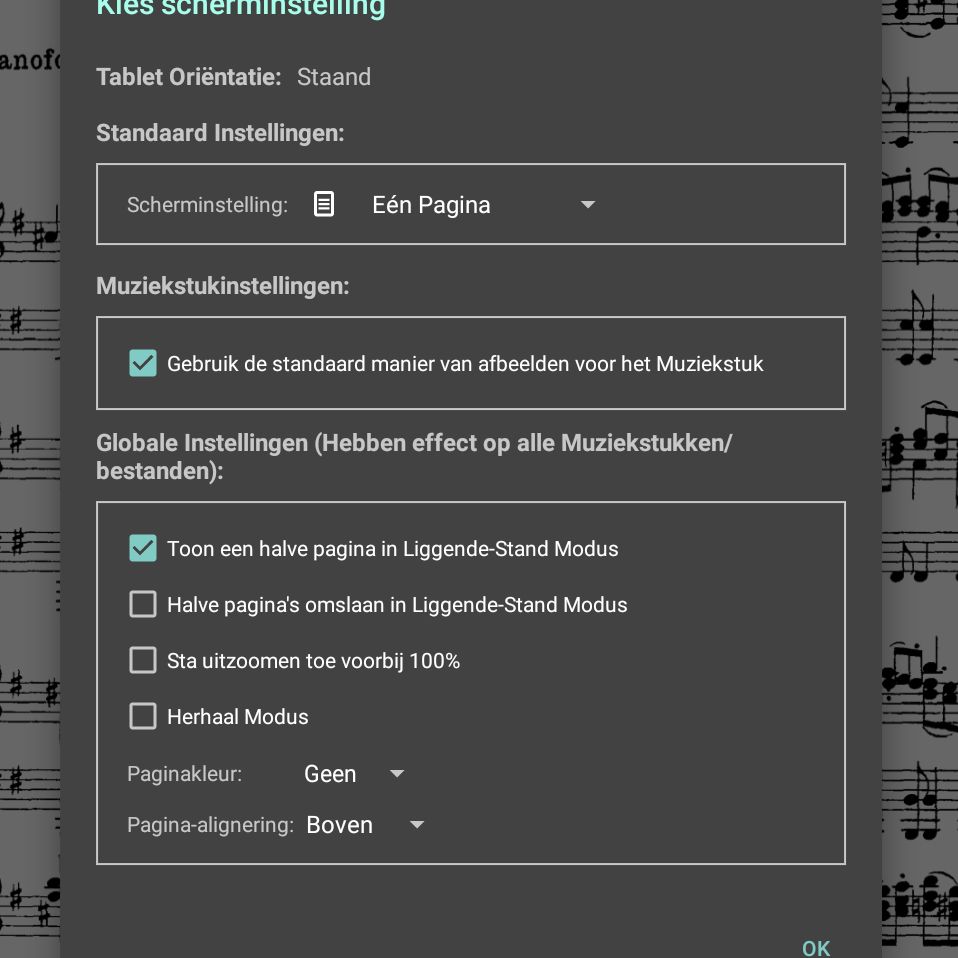
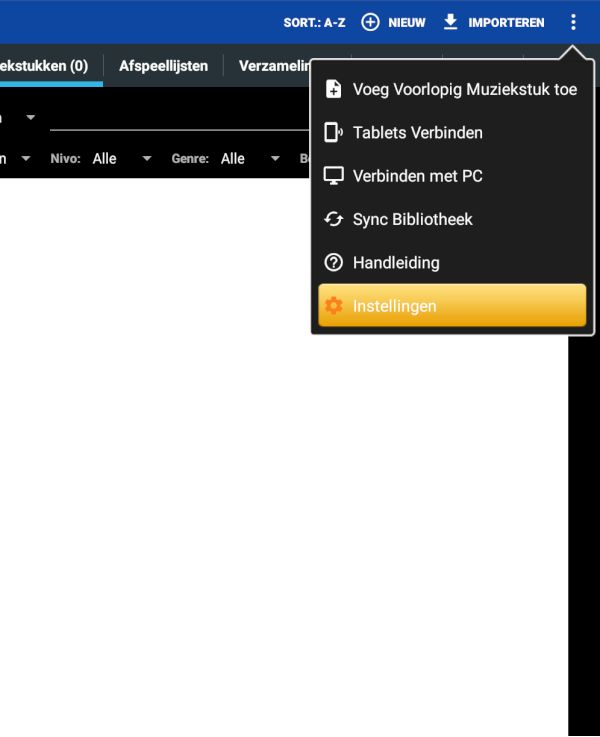 The hiding place of the settings button. (Text in Dutch, but should be in the same place in English.)
Tabs
The library is initially filled with tabs that are unnecessary for classical musicians. This is easy to adjust and makes for a library that’s much easier to navigate. For classical music, you really only need a tab with composers and possibly a tab with music titles. A tab with recently opened files is a handy third tab. (And honestly my most used tab by far.)
To do this, press the three dots stacked on top of each other in the top right corner, and go to “Library settings”. Here you’ll find a large number of settings. Read through them carefully so you know the options are there. Also, try out some things; for example, I can recommend the dark theme, and for classical composers, characters don’t need to be “normalized.”
 This way, the composer's name is always at the front of the library.
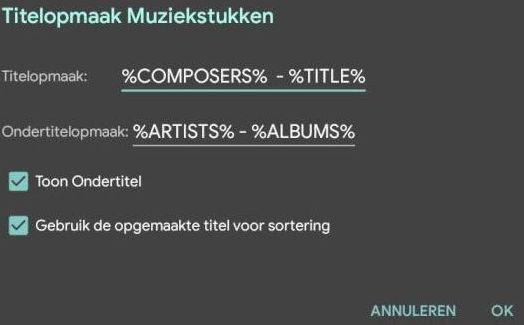
Specific settings that are useful for classical music can be found under the “Piece Title Formatting” button. I would recommend setting this as in the image to the right.
Then press “Tab Selection and Order”. Here, I can recommend the tabs as in the image below. The rest of the tabs might be more interesting for pop musicians, but not very relevant for most classical music.
Update 2025: These days I also use the “Setlists” tab.
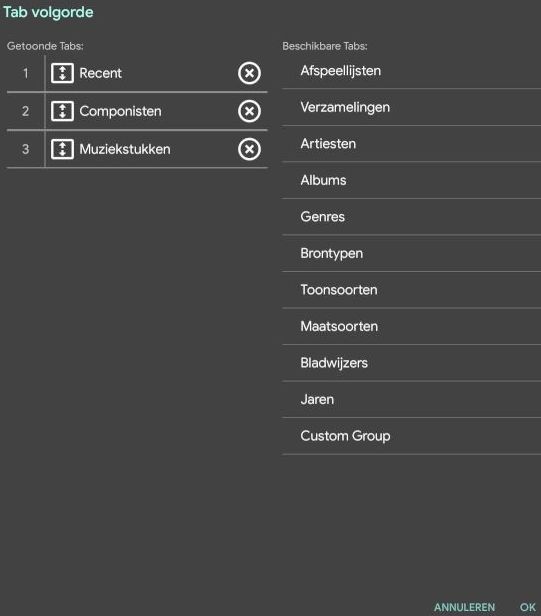 These three tabs are sufficient for most classical musicians.
Other Settings
Don’t be intimidated by all the buttons: the MobileSheets settings are well worth a small time investment to be able to set everything to your liking. An overview of the most relevant options per tab of the settings:
- Storage: Here you can set up Dropbox and Google Drive, among other things.
- Display settings: The default settings here are good, but I turned off the page-turning animation here to be able to see the next page faster in the heat of the battle.
- Import settings: Here I enabled aggressive cropping. The less margin, the better on a small screen. What do you need whitespace for on a tablet?
 This way, most touch areas simply turn the page.
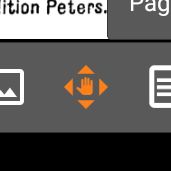
- Touch and pedal settings: Here are options for Bluetooth pedals. I haven’t used this myself yet. It’s useful to look at the “Touch Actions.” The screen can be roughly divided into a grid (see later in this blog post). With these options, you can set what each of the cells of the grid do when you press them. I recommend the settings in the image.
- Text file settings: Especially relevant for people who play (guitar) tabs, whose “sheet music” is often in text files.
- MIDI settings: I haven’t used this yet and it’s probably more relevant for pop musicians.
- Backup and restore: Can come in handy if you’re going to buy a new tablet at some point.
- Other settings: Read through these to see what’s possible. I recommend disabling the Audio Player in “Performance Mode” so you’re less likely to suddenly play audio during a concert.
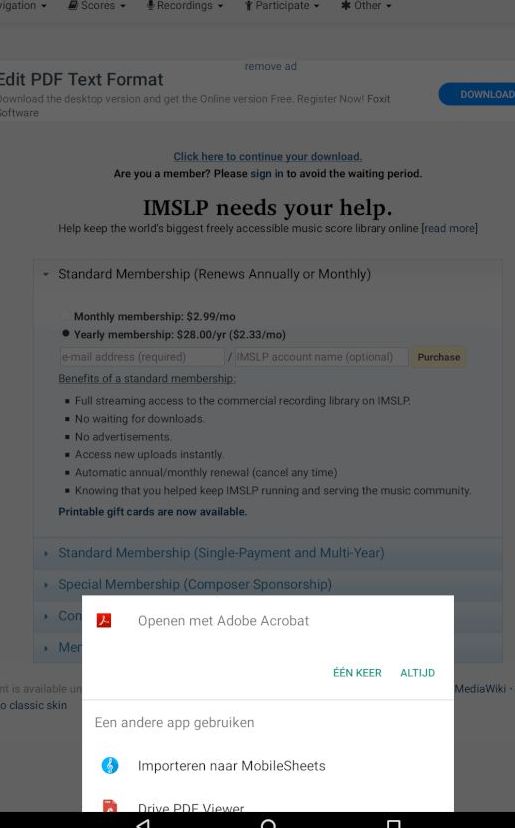 Press "Import to MobileSheets".
Viewing Sheet Music
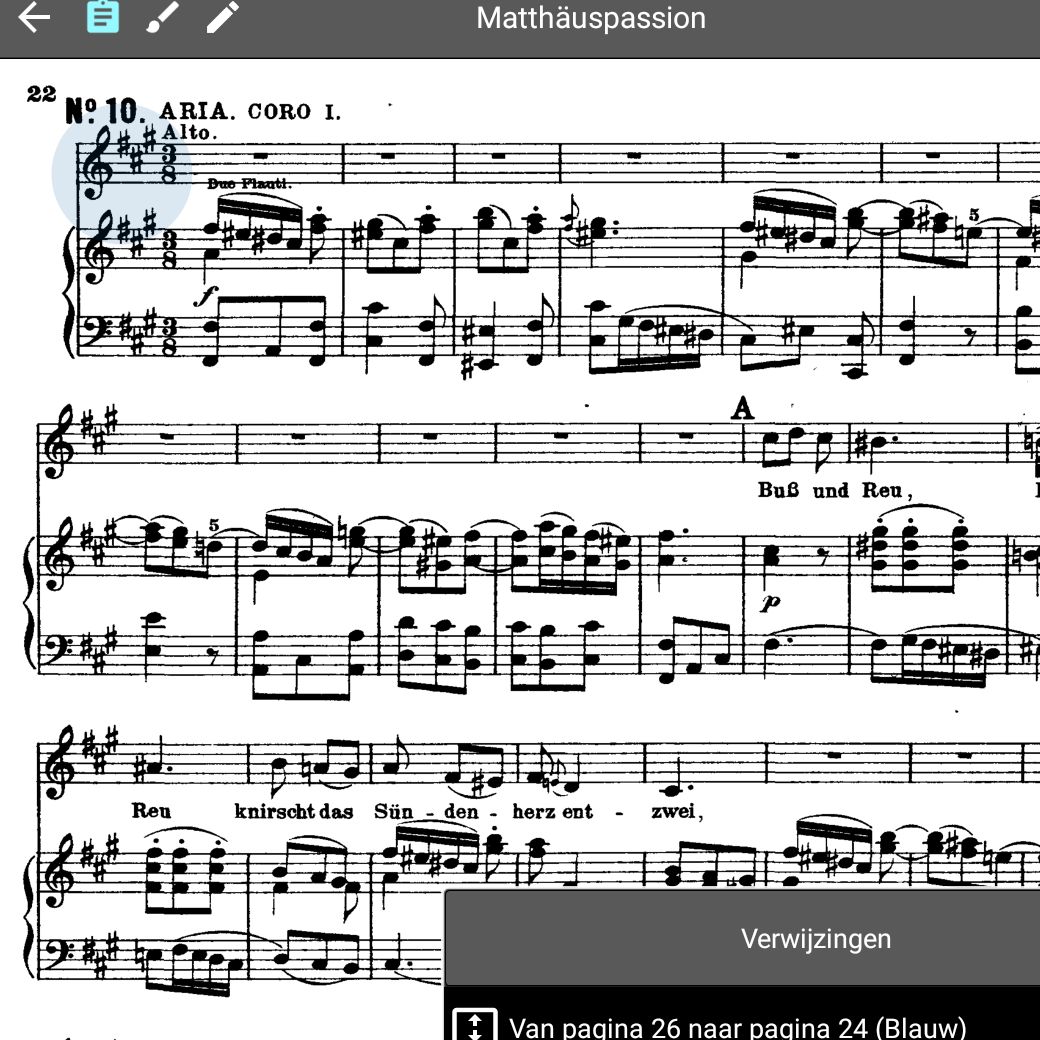
Once the settings are optimized for classical music, it’s time to import your first piece of sheet music. As an example, I downloaded a piano reduction of the St. Matthew Passion from IMSLP.
When you import the file, you’ll come to a screen where you can edit the file before it’s added to your library. In this blog post, I’ll cover the “Fields” and “Files” tabs; in a future post, I’ll show you how to link an MP3 file to your sheet music to help with studying.
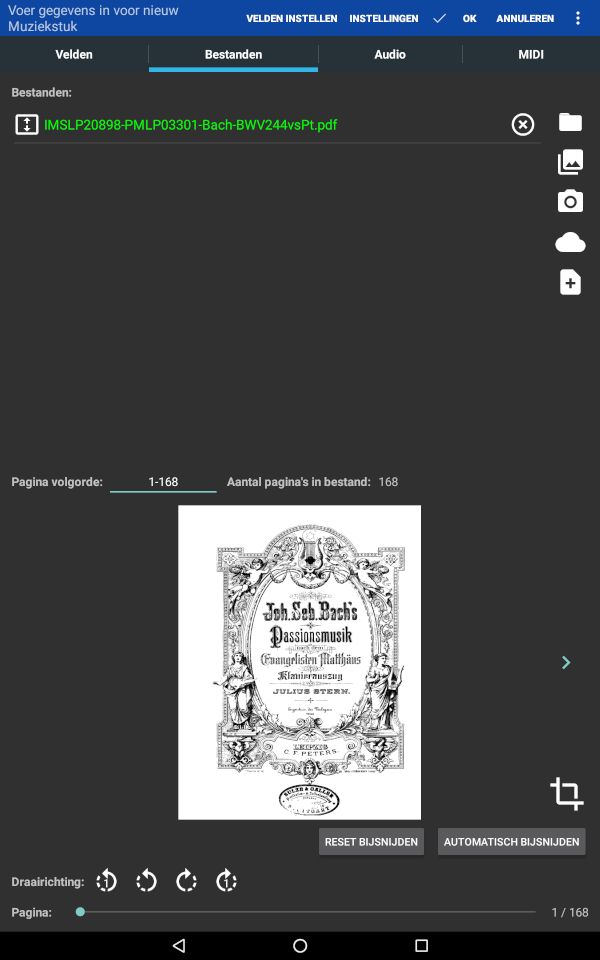
“Files” Tab
At the top of the screen, you’ll see the files that belong to this piece of music. Usually, there’s only one file here, as now. If the piece of music consists of multiple separate images or PDF files, you can add them with the buttons on the right. This should be fairly self-explanatory. If not, see the manual.
In the bottom left of the screen is the option to rotate all pages or only the page currently displayed. In the bottom right is the most powerful feature of the app: automatic cropping of page margins, which allows the sheet music to be displayed as large as possible on your tablet screen. You can do this per page by pressing the  icon, or you can press “automatic crop,” and the app will do it for you.
If the automatic cropping was inadvertently too enthusiastic, causing notes to fall off the page, you can always return to this screen to make manual adjustments.
“Fields” Tab
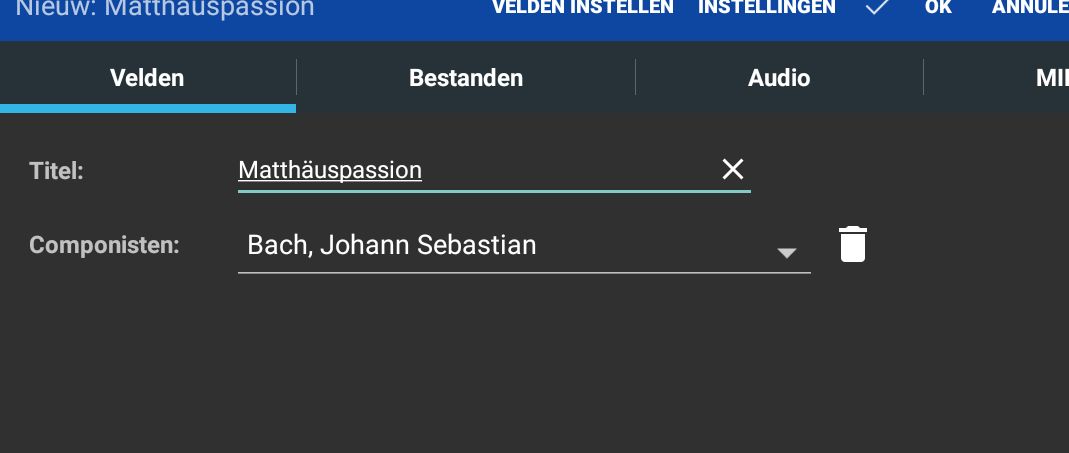
On this page, you can fill in the so-called meta-information of the piece of music. By default, many fields are enabled that you can fill in, but I have disabled all fields except “Composers.” Do this by pressing “Set fields” at the top of the screen and unchecking all boxes except the one for “composers.” Or not, of course, if you find certain fields useful! (In that case, you’ll probably want to restore the corresponding tab in the library.)
Now press OK at the top, and your library will have its first piece of music.
It can of course happen that you want to sort your music by genre if you have a very large library. Or you can create a "Custom group" for instrumentation.
Displaying Sheet Music and Making Annotations
Open a piece of sheet music by pressing it in the library.
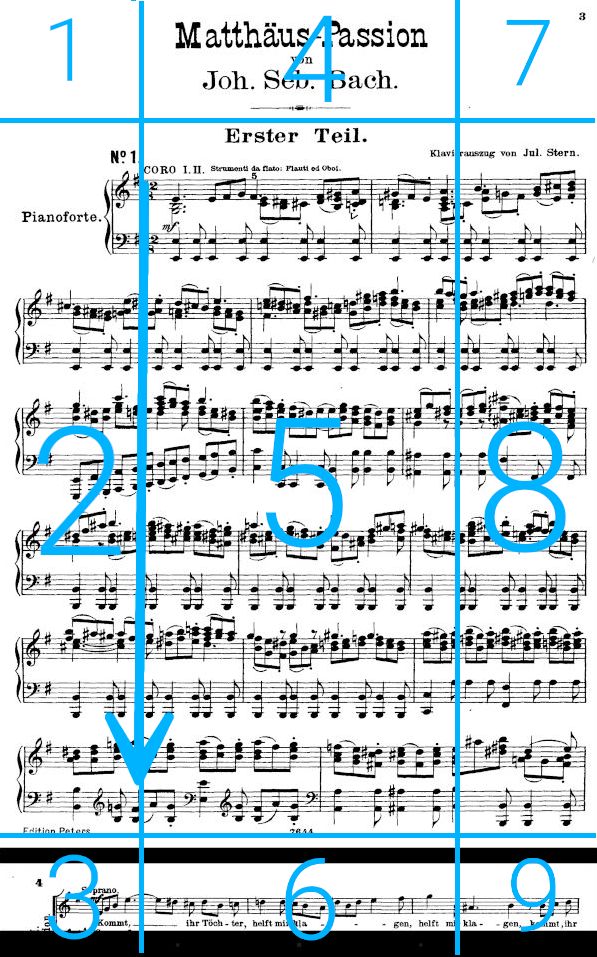 The sheet music screen is divided into an invisible grid of touch areas with three rows and three columns.
The screen is divided into nine invisible “touch areas.” You set these in the “touch actions” in the settings. If you follow my settings there, you’ll get the following effects:
- Previous page
- Previous page
- Previous page
- Show overlay screen
- Show overlay screen
- Make annotations
- Next page
- Next page
- “Quick action box”
Once you understand these touch areas, it make navigation much easier. The overlay screen, the annotation screen, and the “Quick action box” are the three navigation screens you want to master to work quickly during rehearsals and concerts.
Overlay Screen
The overlay screen is accessed by pressing box 4 or 5, and disappears again when you press 4 or 5 again.
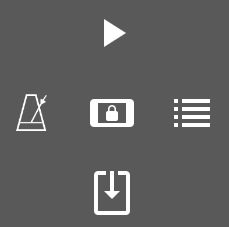
A brief description of the most important buttons:
From left to right:
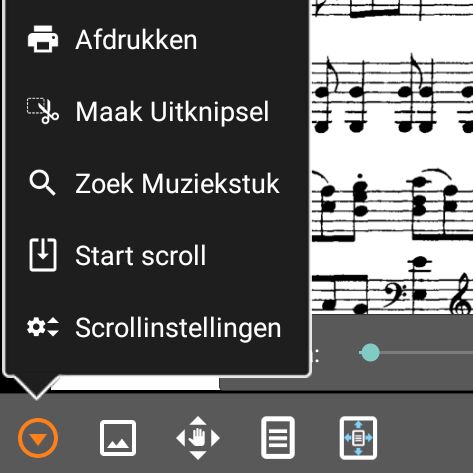
These options are largely self-explanatory. A "Snippet" allows you to clip a part of the sheet music into a PDF file with only those pages.
There is also an auto-scroll function in the app that automatically slides the music to the next page at a set tempo.
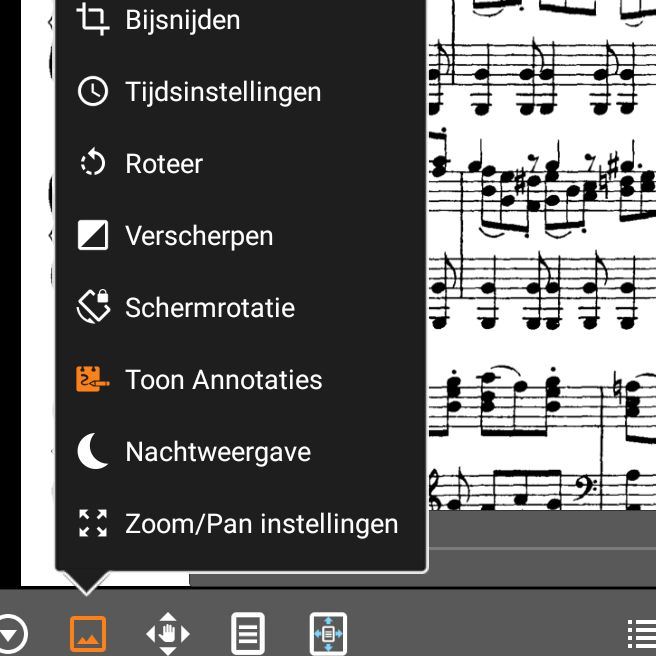
Allows you to quickly crop the margins of the current page, display a clock on the sheet music, and more.
Perhaps useful for very large scores: this allows you to set whether you can move the image on the page by rubbing your finger over it. If the entire page is already displayed, this button does nothing.
 -button. Settings for the display of the sheet music on the screen. The default settings are fine for most sheet music.
Tip: Set the screen setting to "Vertical scrolling." If you've cropped your margins tight enough, you can usually see a bit of the next page on your screen, which can be quite handy.
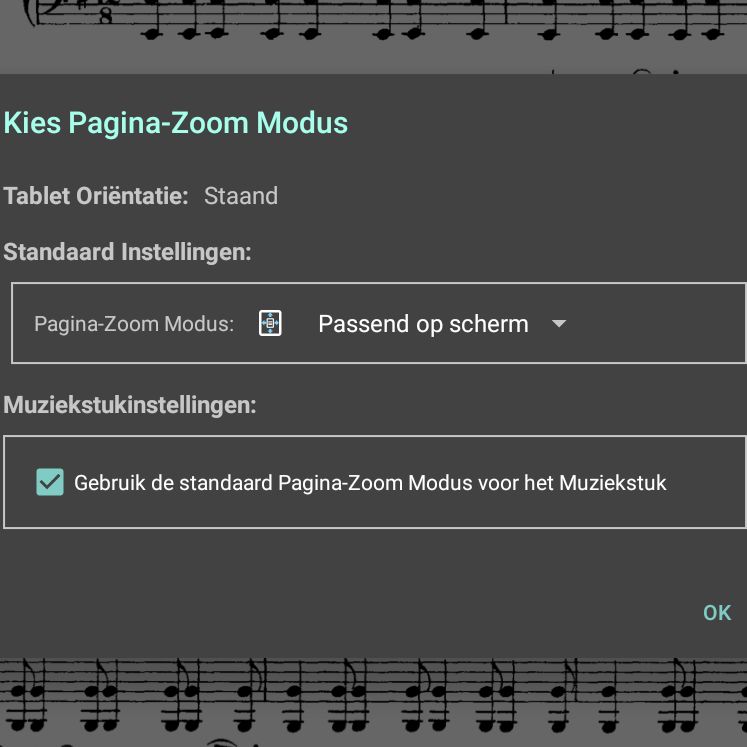
 -button. If you have a small tablet, it may be useful to choose "Fit to width" here, which can help with readability.
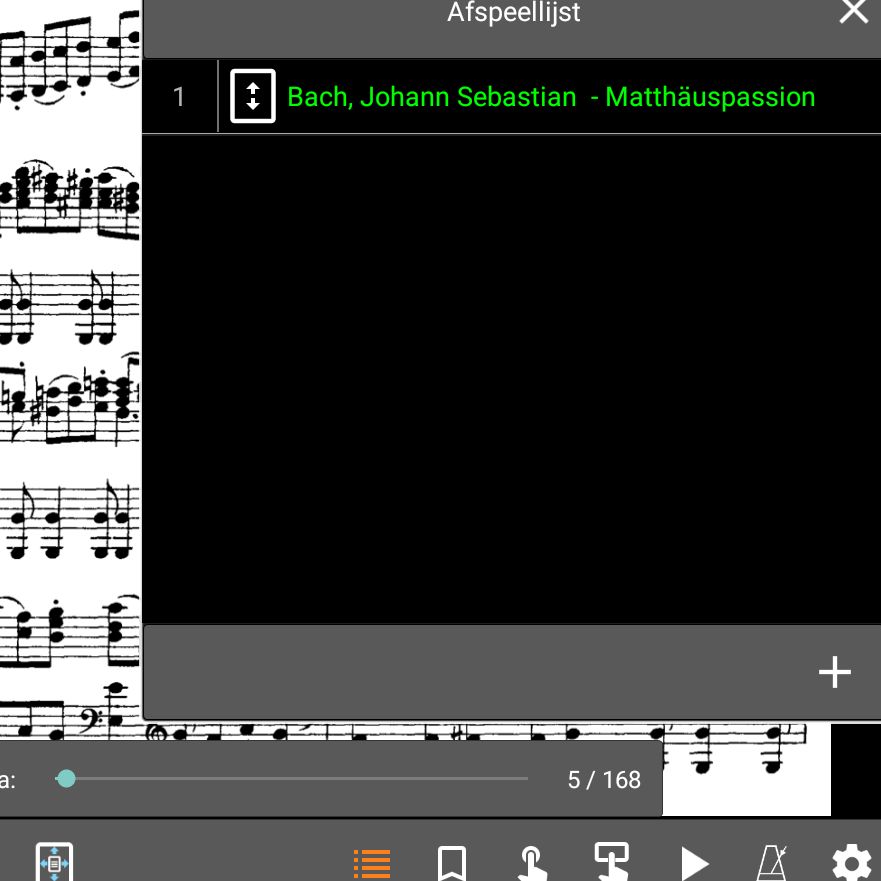
This allows you to create a "setlist" of a concert if you want to be able to quickly switch between pieces in the correct order.

Go to the page for which you want to create a bookmark and press + to create a bookmark. If your PDF file already had bookmarks, they will be displayed here automatically.
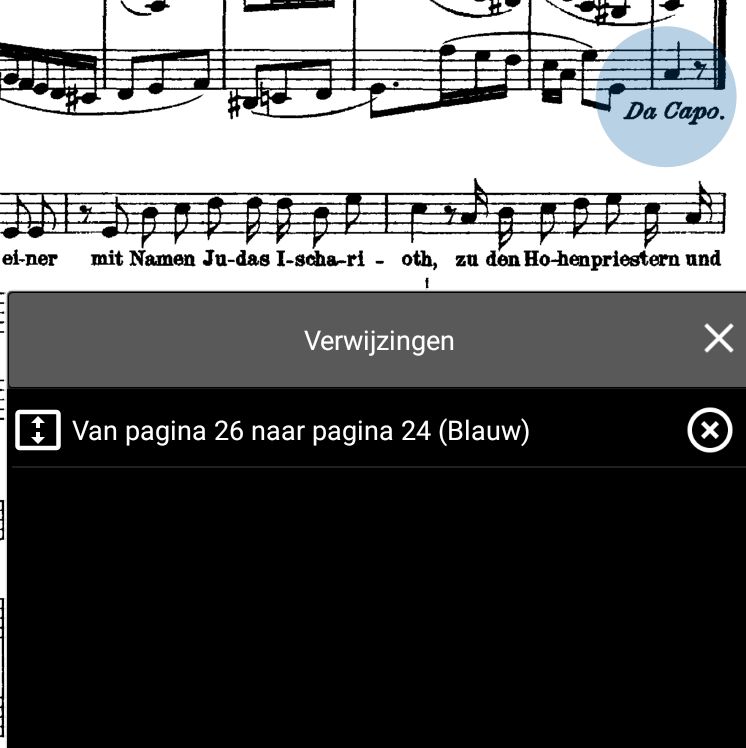
A handy advanced feature: if your piece of music has a repeat (da capo, dal segno...), you can use this to create a so-called "Link." Press +, then on the spot where "da capo" or something similar is...
...and then on the spot where you want to go back to. Colored circles (the Links) appear on the page, allowing you to immediately go to the repeat spot.

Hold a reference point in the list to adjust the size of the circles in the sheet music.
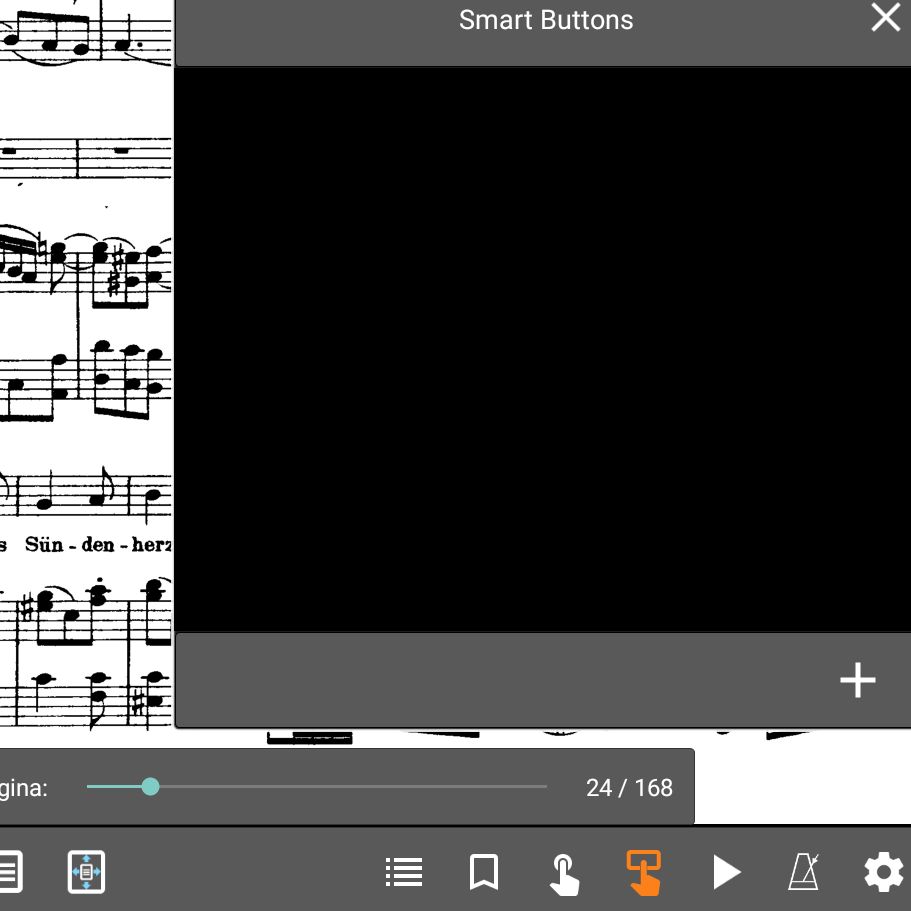
Similar to reference points are the *smart buttons*. However, these do something with MIDI, which classical musicians usually don't have much to do with.

This allows you to play a sound file that is linked to the sheet music. I will discuss this further in a later blog post.
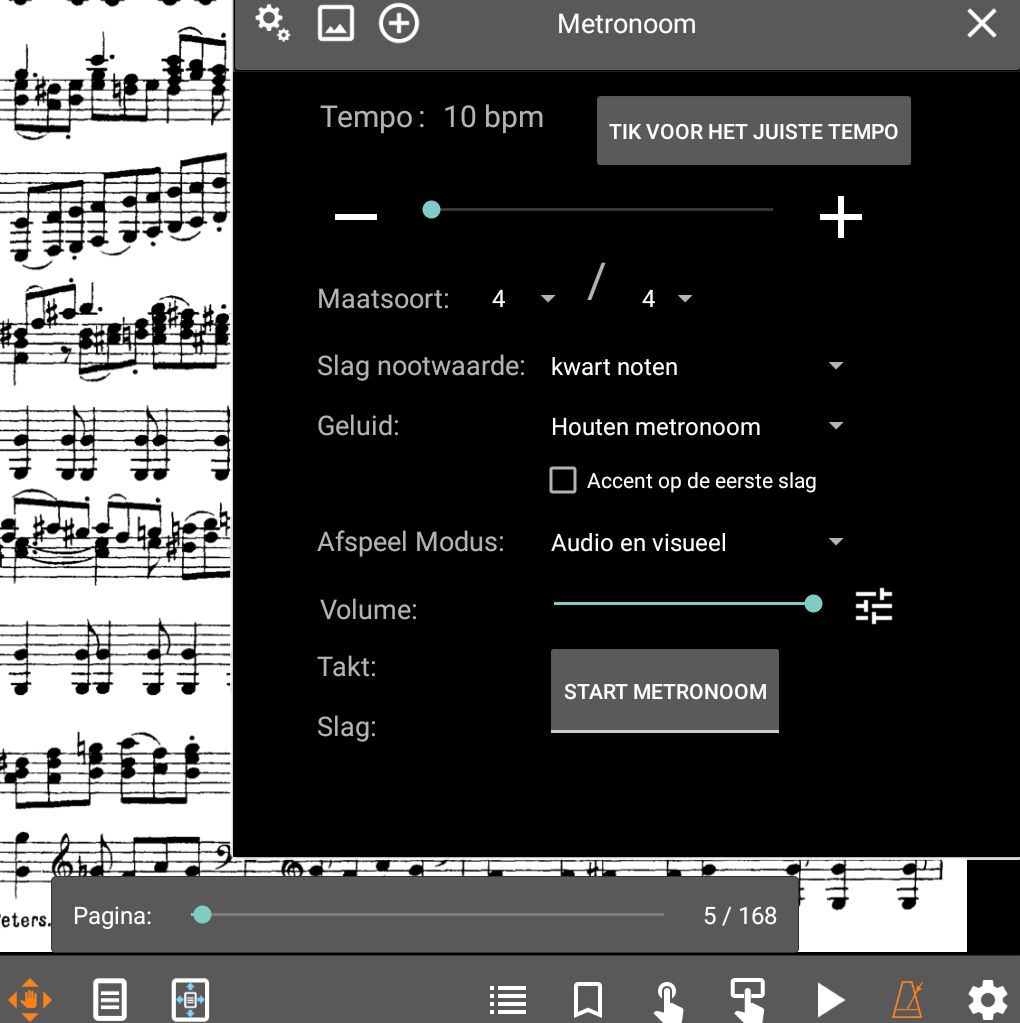
There is a metronome built into the app. Handy. A small piano would also be handy for us singers, but unfortunately, that's not there.
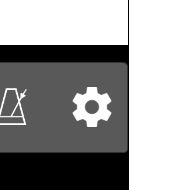
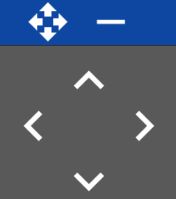
Finally, this allows you to quickly go to the app's settings.
“Quick Action Box”
 This was translated into Dutch quite clunkily, which is why I usually leave my apps in English.
Catchy name, isn’t it? Here are a number of buttons that are also in the overlay screen, which the app’s developer thought would be used the most.
The middle button is not found in the overlay screen: this is for concert mode. This is a kind of safety mode: all touch areas of the screen are disabled except for the “Quick action box” in the bottom right, so you don’t accidentally open some menu during a concert when you want to turn the page. Touching the screen now always ensures that you go to the next or previous page. The concert mode button can also be found in the library.
Annotations
 Having fun scribbling.
Update 2025: This looks a bit different today. But most of the actual options are still the same, if in a different place.
The annotation mode is quite self-explanatory. The “undo” button is in the top left, so go ahead and experiment. A few tips:
- The pen and highlighter settings I use are a good start, but see what works best for you.
- “Smooth mode” tries to make your annotations less angular but usually results in less precision. Not usually recommended.
- Everything is already set correctly in the menu at the top left. Two remarks:
- Stylus mode is intended for an “active” stylus. This does not work with a normal “passive” stylus.
- Auto-save when changing pages is recommended. If you quickly scroll through the file while annotating with the buttons at the top right, you can easily accidentally press the cancel button next to it.
- With the arrows in this box, you can precisely move the annotation you just made:
- Also see the tip in my other blog post: zoom in before you start writing.
- By tapping your screen with two fingers at the same time, you can quickly switch between pen/highlighter and “move mode.” Very handy if you’re zoomed in and want to make an annotation on another part of the screen.
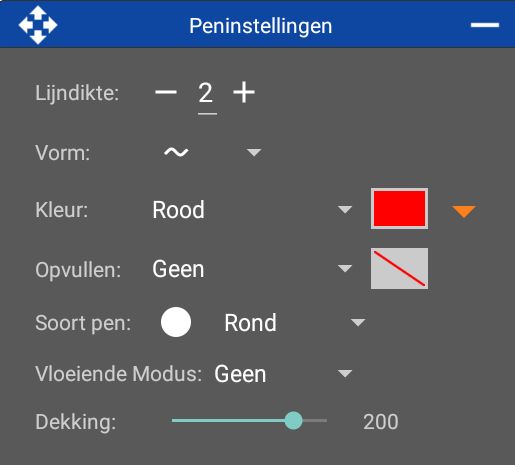 My pen settings.
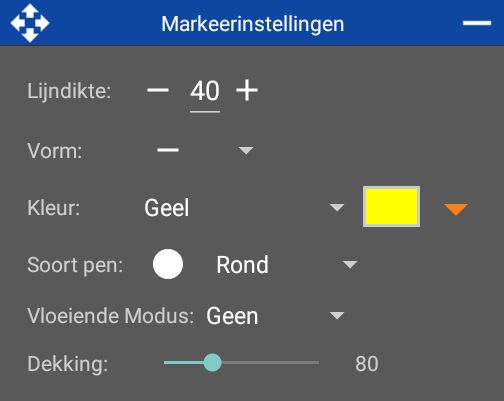 My highlighter settings.
Other Apps
In addition to MobileSheets, there are also a number of other apps for sheet music. Below is a brief list with some observations.

My Sheet Music
App intended for viewing sheet music on your smartphone, not on a tablet. If possible, you should avoid this entire scenario, but in emergencies, this app can provide a solution. Seems to be discontinued in 2025.
- Price
- €2.99

Orpheus Sheet Music PRO
Also has a free version. Simpler than MobileSheets and with a less active developer. In its simplicity, it also lacks many features that MobileSheets does have. Although this app is cheaper, it adds little to a simple PDF viewer for that money. Not updated for more than a year in 2025
- Price
- €7.49

Sheet Music
Very simple app with no support for annotations. Free, so worth considering in that regard, but you're better off using a free PDF viewer that does support annotations.
- Price
- Free
Adobe Acrobat Reader
Not specifically intended for sheet music, but if you don't want to pay for your apps, this might be your best choice. Supports annotations, tapping to go to the next page, and other handy tricks.
- Price
- Free
In addition, you have a number of apps that belong to a specific sheet music website, such as MuseScore, Virtual Sheet Music, and IMSLP Browser. These are less well-maintained and also only support sheet music from their own source. There are also all kinds of apps that allow you to photograph sheet music to have it played by the app. These types of apps are more gimmicks and not particularly suitable for displaying sheet music.
Do you use another app for sheet music that you are satisfied with, or have I forgotten any handy features of MobileSheets? Let me know in the comments!
Until next time,
Sebastiaan Ammerlaan