Setting up Gnome (Linux) for seniors
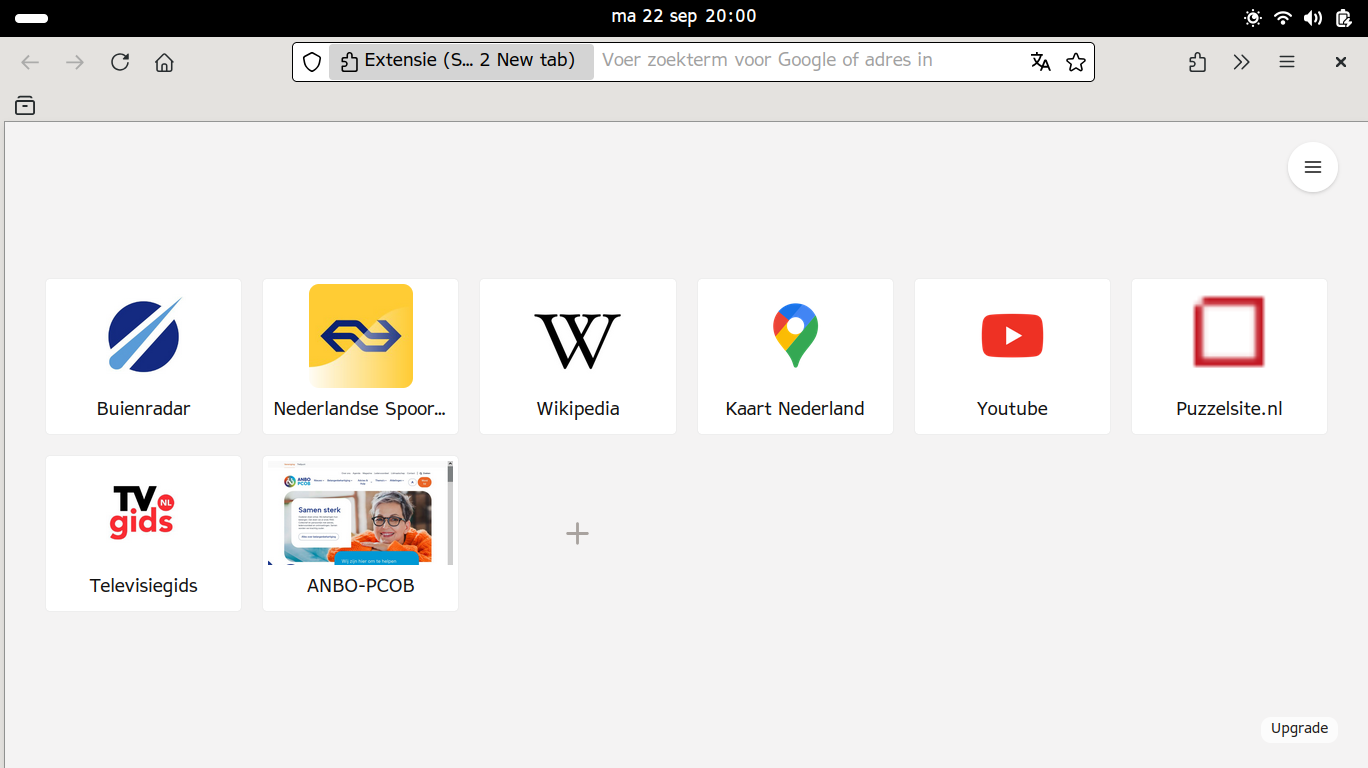
[ #linux opensource gnome seniors software firefox geary abiword nautilus extensions plugins 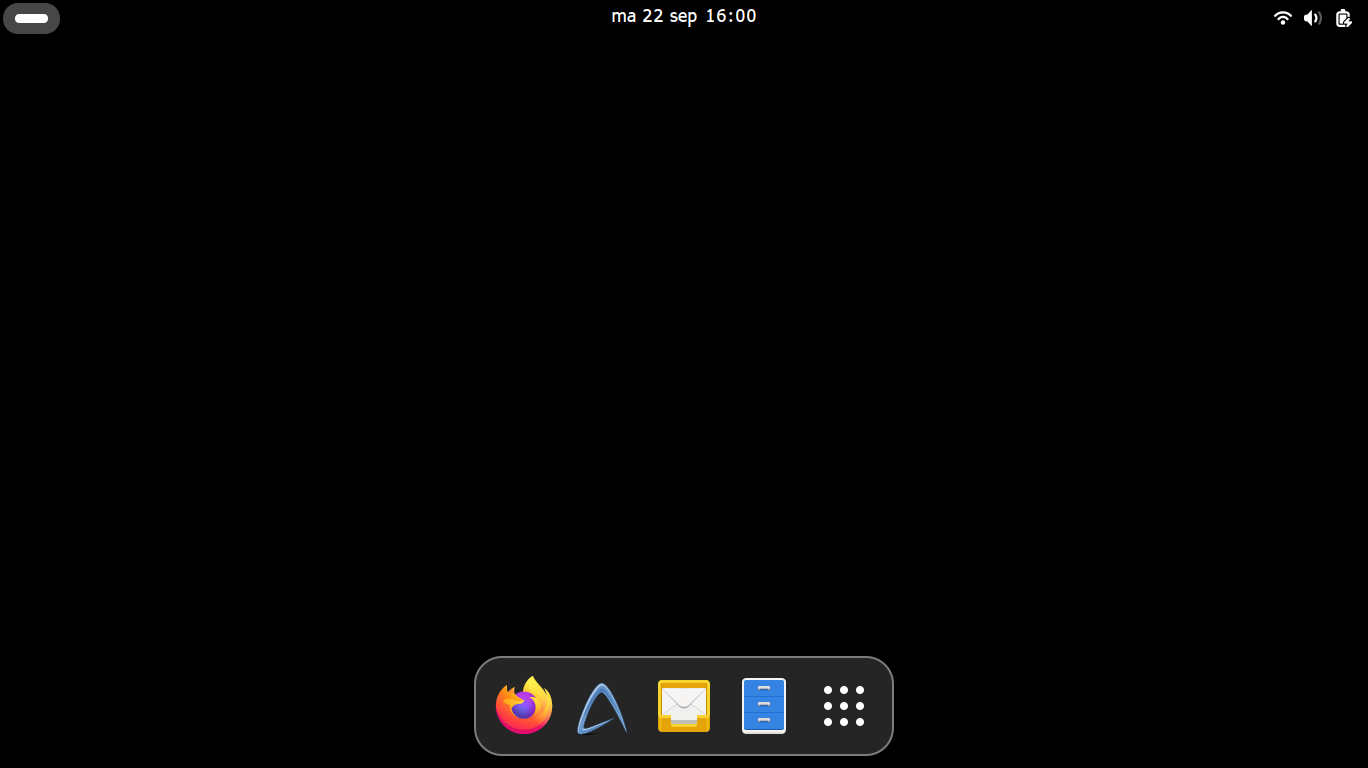 The final result of following this guide.
I have a grandparent who has an old laptop with Windows 8 that they didn’t use anymore. It was too confusing, basically. They are over 90 years old and can’t really handle any of the complicated stuff anymore.
Linpus Linux
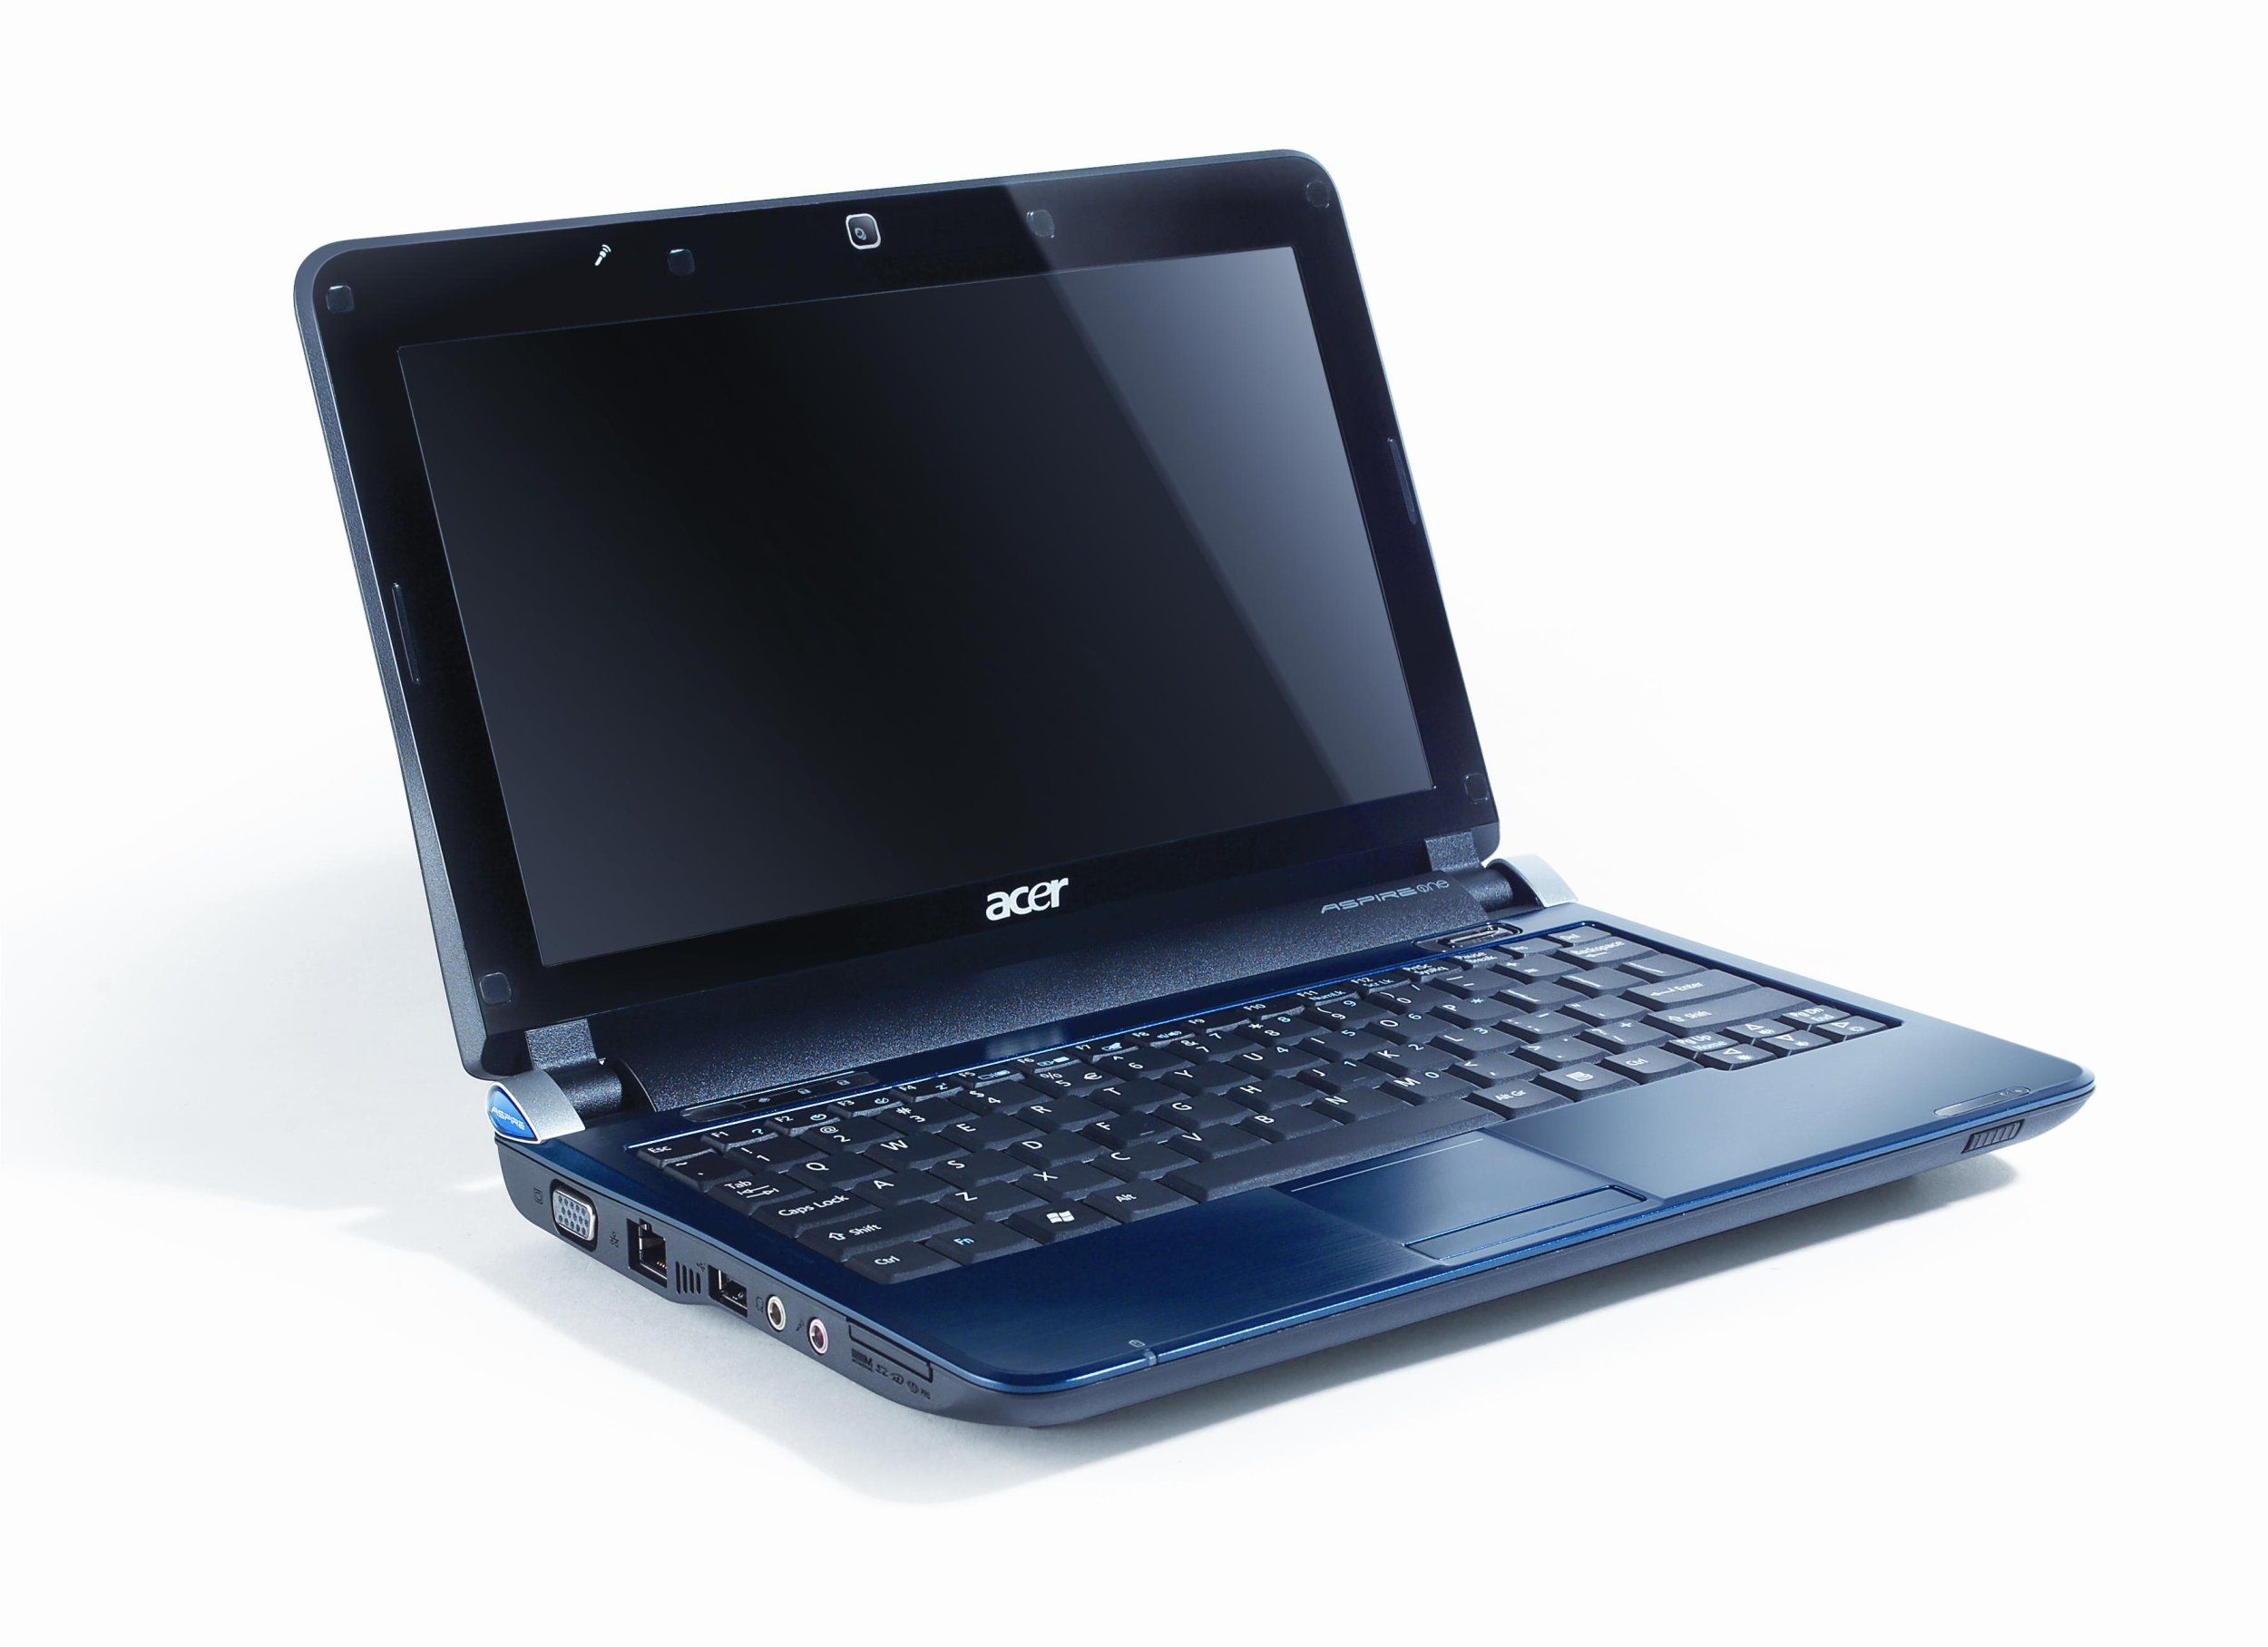
Back when I bought my very first laptop as a poor student, I had to go for the absolutely cheapest option available. I got the original Acer Aspire One—a netbook from 2008 which had a Linux and a Windows XP option. Newer versions of Windows already existed, but its CPU was too weak to handle those(!). The Linux version was cheaper, though, so that’s what I went with.
It came installed with something called “Linpus Linux Lite”, a heavily restricted thing based on Fedora. It had these big buttons for a set number of programs, which couldn’t be changed in any way. Nor could you install any other software… It was not really very usable or future-proof.
(Fortunately, you could install different Linux distributions on it, leading me to try out all kinds of different distributions. I ended up using CrunchBang Linux and then eventually ended up with Arch Linux which I still use today. This little netbook beast was a great gateway drug for Linux! But that’s a story for another day.)
Goals
When I visited my grandparent the other day, they mentioned being sad to not be able to write simple word documents anymore and then printing them. He’d written down step-by-step instructions for all the things they had to do to get to work, but it’d all gotten muddled (and there were just Way. Too. Many. Steps, too!).
- Start computer
- Type in password
- Double click on the “Word 2007” icon
- Press “new file” (top left)
- Etc.
The double-clicking alone was difficult already. And of course, the software was all meant for average power-users, too. Not to mention proprietary and constantly nagging to buy subscriptions for everything. Because Microsoft.
Long story short: I’ve taken their laptop with me and set it up to be as simple as possible. And readable for a visually impaired elderly person, of course. I went with Gnome, which for me was always too limiting in its customizability. And too minimal. But in this case, that seemed perfect. I used Arch Linux for this particular computer, as that’s the distribution I’m most familiar with. But you should be able to do this on any other distribution.
All of these options are obviously optional. Pick and choose what you think will be useful for you. This article is meant for somewhat advanced users, able to install software themselves and able to change the occasional configuration file.
Gnome settings
Display settings
I set the resolution a bit lower, which makes everything bigger. In the case of this particular laptop I went from (Didn’t do this after all… But it’s something to consider!) I also set the desktop wallpaper to full black: with the Auto Activities extension discussed below, the overview screen becomes the de-facto desktop. Having the desktop wallpaper display in a separate shape would just add confusion and clutter to the screen, I think.1600 x 900 to 1368 x 768.
Multitasking
- Disable Hot Corner
- Keep Active Screen Edges, probably can’t hurt.
- Fix number of workspaces to 1. Workspaces are probably not a concept I can expect my grandparent to wrap their head around.
Accessibility
Take a look at the different options and use what seems useful to you. As soon as you select an option, an extra icon pops up in the top-right. To disable this, see Just Perfection settings below.
Privacy & Security
Screen Lock
- Blank Screen Delay →Never. Whatever Automatic Suspend is set to will suffice, and this will hopefully reduce confusion.
Optional: remove password prompts.
For my grandparent, it is highly unlikely anyone else will want to reach their files. No internet banking or anything highly sensitive. So it’s safe enough to disable the password prompts (which just confuse them).
- In Gnome’s preferences set up automatic log-in (System→Users→Automatic Login)
- In
Privacy & Security→ Screen Lock, disable Automatic Screen Lock. - Geary (the email client) will still ask for your password each time you start it, now. I was going to leave the password (mostly to protect the user from themselves), but the only way to disable is is to change Gnome’s keyring password to be empty. To so this, use the
seahorseprogram, right-click theLoginentry and selectChange Password. Then enter the current password first and leave the new password fields empty.
In theory, they can now just close the laptop lid when they’re done with whatever they want to do, and open it back up when they want to continue.
Navigation
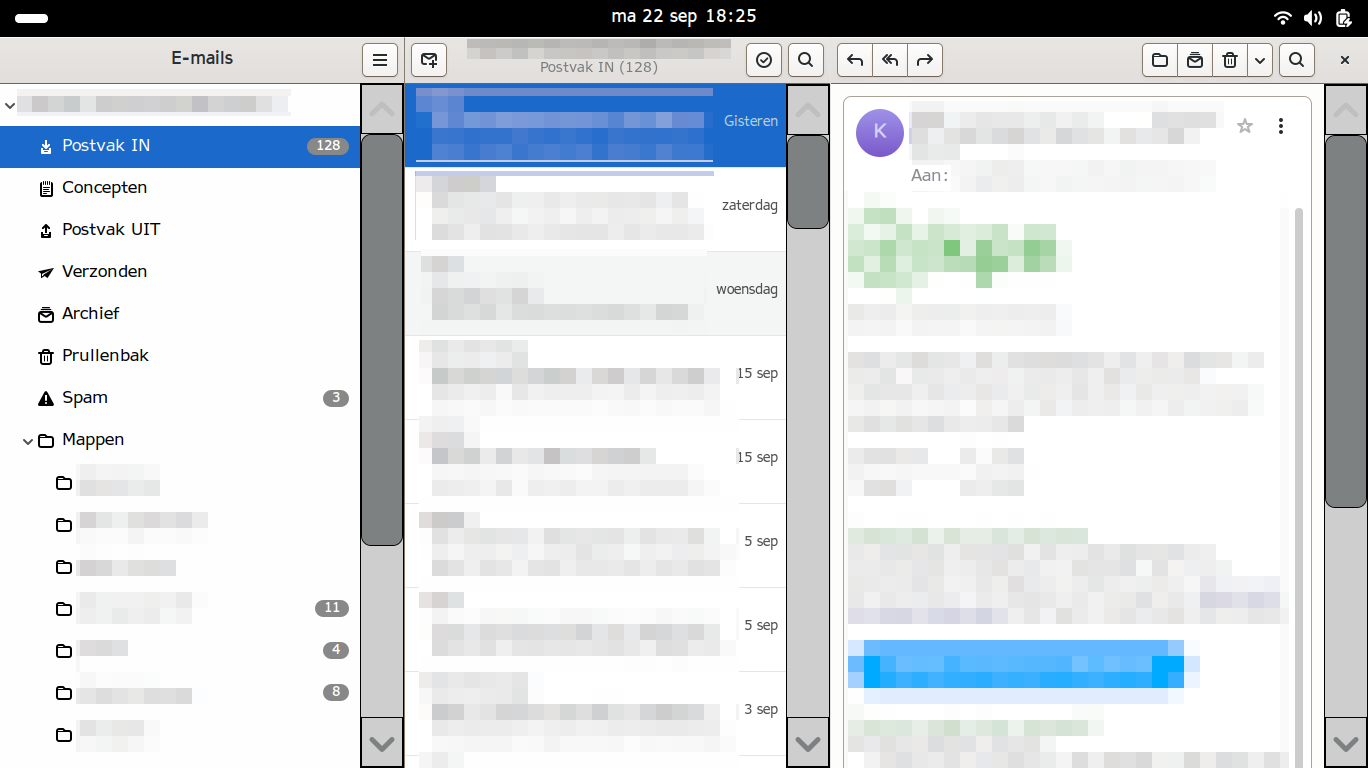
Gnome has an Overview feature that I thought would be easy to configure as a (hopefully) easy navigation centre for my grandparent. They press the super key (or Windows key), and an overview of all the open programs shows, as well as customizable launchers. Given that they only really use a word processor and e-mail (and okay maybe a browser), this results in just four buttons: the word processor, e-mail and internet. Using menulibre, I changed the names of these apps to “Internet”, “E-mail” and “Word Processor”, to remove any further questions there.
Changing those names did lead to the default app associations breaking (darn it), so I then used selectdefaultapplication-fork to set the default applications back. Gnome’s built-in settings refused to acknowledge the differently-named programs as viable default app options, but selectdefaultapplication did. I was pleasantly surprised how well this worked.

Software
My Grandparent only really wanted a word processor. But they do pay for an internet subscription and have an e-mail address, so I figured I’d add an e-mail client and an internet browser (just in case).
Here’s what I went for, and some other useful software:
- Abiword. Has much fewer options than LibreOffice, which is a good thing in this case.
- I configured Abiword to save in the
.odtformat by default, just in case they want to one day share a file. Changing the default file saving format in Abiword is not trivial, as it turns out. Find yourprofilefile in Abiword’s configuration directory (usually in~/.config/abiword), then find the section that starts with
- I configured Abiword to save in the
<Scheme
  name="_custom_"
Here, add the line DefaultSaveFormat=".odt".
- Geary. This seemed the e-mail client with the least advanced options. Again, a good thing.
- Firefox
- Useful plugin: AdNauseam to block ads
- Also Speed Dial 2 for a nice and easily customisable home screen.
- Also installed the GNOME Shell integration. Can’t hurt. Also needs gnome-browser-connector installed.
- I Hate Tabs. I actually do not hate tabs, but my experience is that older users find them a difficult concept to understand.
- I also turned on Firefox’ new vertical tabs function, then dragged the sidebar to the left to effectively hide the tab bar.
- Changed some scrollbar settings to be more friendly to the visually impaired following the instructions from this useful blog post from Athena’s blog. (Internet Archive copy)
- I have since taking the screenshot also removed the big firefox extension text in the address bar. For this, follow the instructions here.
- Gnome Files (i.e. Nautilus). Changed the settings to sort directories before files and to open items with a single mouse click.
- Rustdesk for remote help
- Some games. Gnome Mahjongg, AisleRiot Solitaire, Gbrainy and Gnome Crosswords.

Gnome Tweaks settings
- Fonts: Both set to APHont. I don’t know if this font really reads better for people with poorer eyesight, but it can’t hurt. It’s not an ugly font, in any case.
- Appearance: Icons to HighContrast. Cursor to Simp1e-amber-neron (Source).
- Mouse: Disable Middle Click Paste. This will only lead to confusion.
Gnome extensions
I used four Gnome extensions to set up the computer:
Always show titles in overview
I pretty much left all settings for this extension at the default.
Just Perfection
My goal here was to disable as many things as possible that my grandparent wouldn’t use. This reduces the visual clutter and, hopefully, confusion.
Visiblity settings
- Keyboard Layout → Disable. Won’t be used (in their case.)
- Accessibility menu → Disable. Just another confusing icon, and I don’t expect the user to set these options themselves.
- Search → Disable. Won’t be used.
Behavior settings
- Window Maximized by Default → Enable. Good for the eyes.
- Double Super to App Grid → Disable. Can only confuse.
Quick Settings Tweaks
Toggles
I turned off the DND Quick Toggle. Not a concept I want to try explaining to my grandparent. They will not usually get many notifications, anyway.
Layout
Quick toggles layout:
- Dark Mode Toggle Button → Hide. Just another unused setting.
- Night Light Toggle Button → Hide.
- Airplane Mode Toggle Button → Hide.
- Power Mode → Hide.
- Bluetooth Toddle → Hide. I considered leaving this, but they don’t have any bluetooth devices. So why leave it?
System items layout:
- Capture button → Hide.
- Settings button → Hide. You can still reach this through the overview menu.
- Lock button → Hide.
Auto Activities
Just the default settings here. Makes it so that the overview window automatically shows when the last active program has been closed.
Gnome advanced GTK settings
To add big scrollbars with arrow buttons at the top and bottom (which seems a much saner GUI choice for seniors), create a file called gtk.css in ~/.config/gtk-3.0 and ~/.config/gtk-4.0. Create these directories if they don’t already exist.
Put the following content in the files:
~/.config/gtk-3.0/gtk.css
scrollbar slider {
 padding: 8px;
}
scrollbar {
  -GtkScrollbar-has-backward-stepper: true;
  -GtkScrollbar-has-forward-stepper: true;
}
scrollbar slider {
    min-width: 20px;
    min-height: 13px;
    margin: 0px;
    border: 1px solid black;
}
scrollbar, scrollbar button, scrollbar slider {
  min-width: 24px;
  min-height: 48px;
  border: 1px solid black;
}
GTK 4.0 doesn’t support “scrollbar steppers” anymore (those arrows at the top and bottom of a scrollbar). They are apparently an accessibility issue, as the click targets are too small. Which I get, although with these chunky scrollbars the click targets would be significantly larger. Anyway, to just have the larger scrollbars, add the following:
~/.config/gtk-4.0/gtk.css
scrollbar slider {
 padding: 8px;
}
scrollbar {
  -GtkScrollbar-has-backward-stepper: true;
  -GtkScrollbar-has-forward-stepper: true;
}
scrollbar slider {
    min-width: 20px;
    min-height: 13px;
    margin: 0px;
    border: 1px solid black;
}
We’ll have to teach our grandparents to scroll with the mouse wheel, I suppose.

This chonky boi is visible in programs using GTK3.

The scrollbar in GTK4 programs.
Conclusion
And there you have it! I’m yet to actually test this set-up with my grandparent, but I figured I might as well share what I have so far. Of course, you’ll also need to include a printed document with screenshots and instructions for the common things they will want to do. I’ll share the one I’m writing here, once it’s done.
Until next time,
Sebastiaan Ammerlaan